Welcome to our Jeweled Forest – Freezer Paper Piecing Class (10 hours) - Intermediate
DATE: Thursday January 29th 10:30-3:30 and February 19th 10:30-3:30
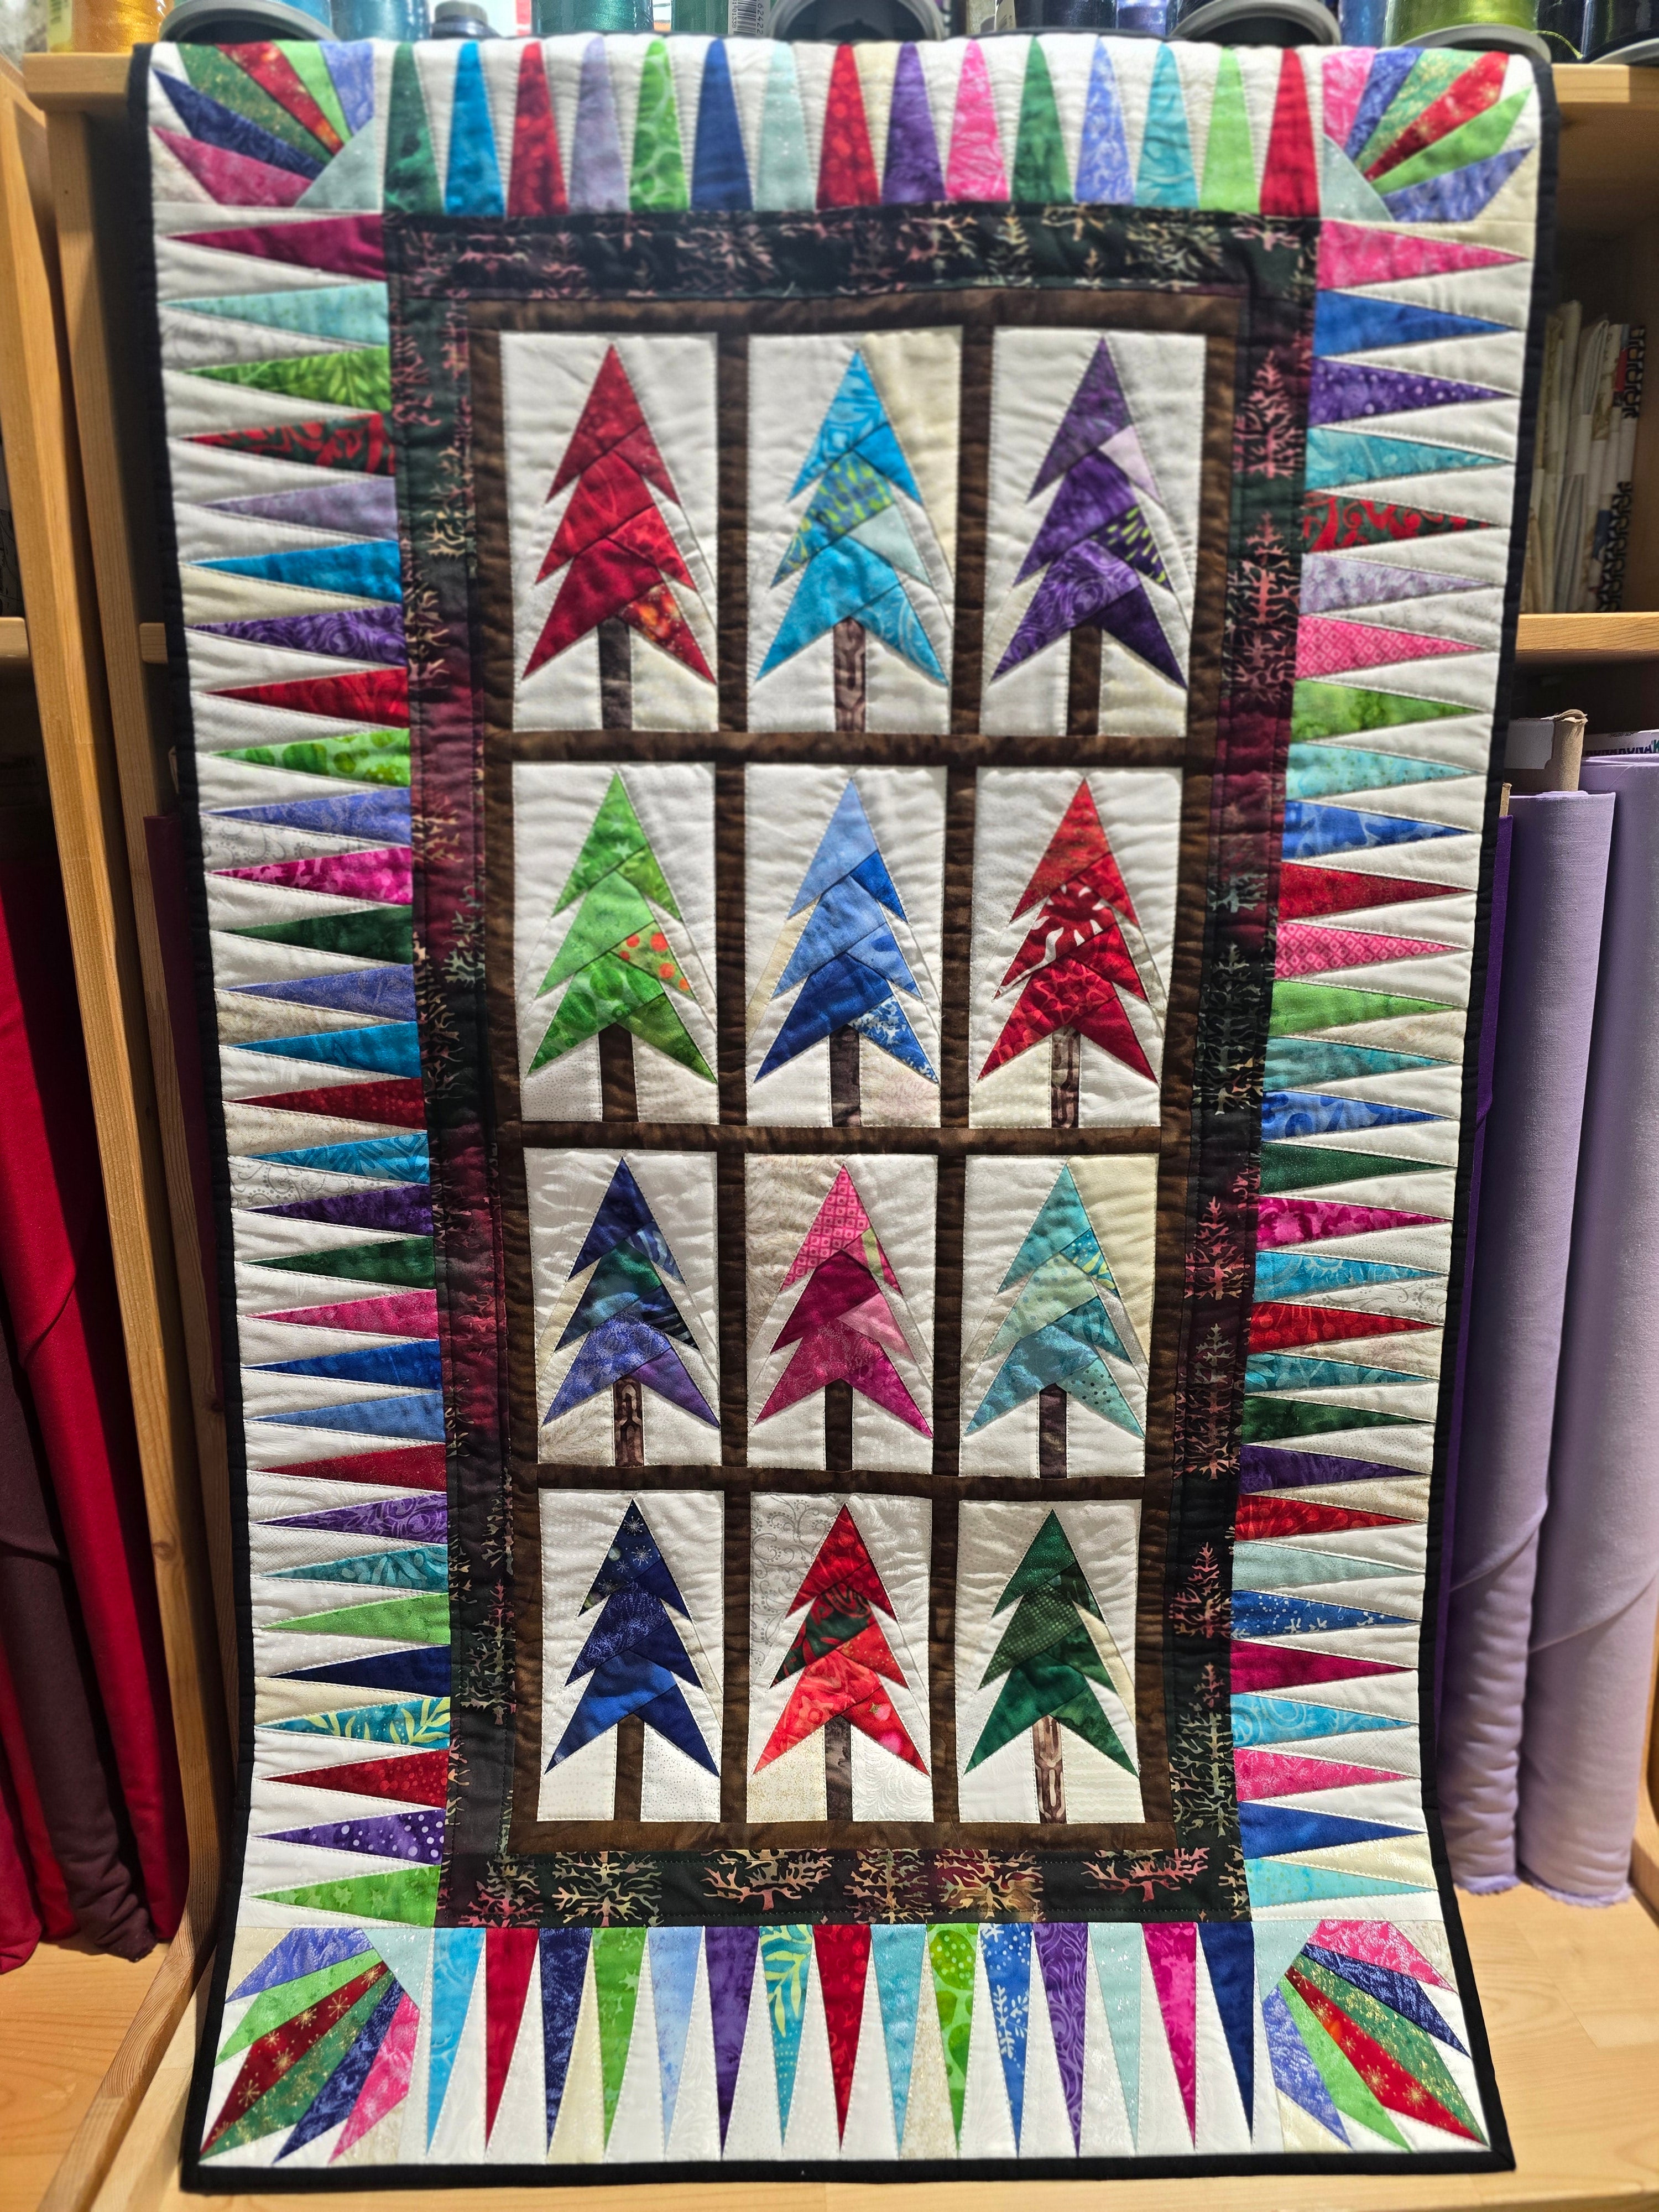
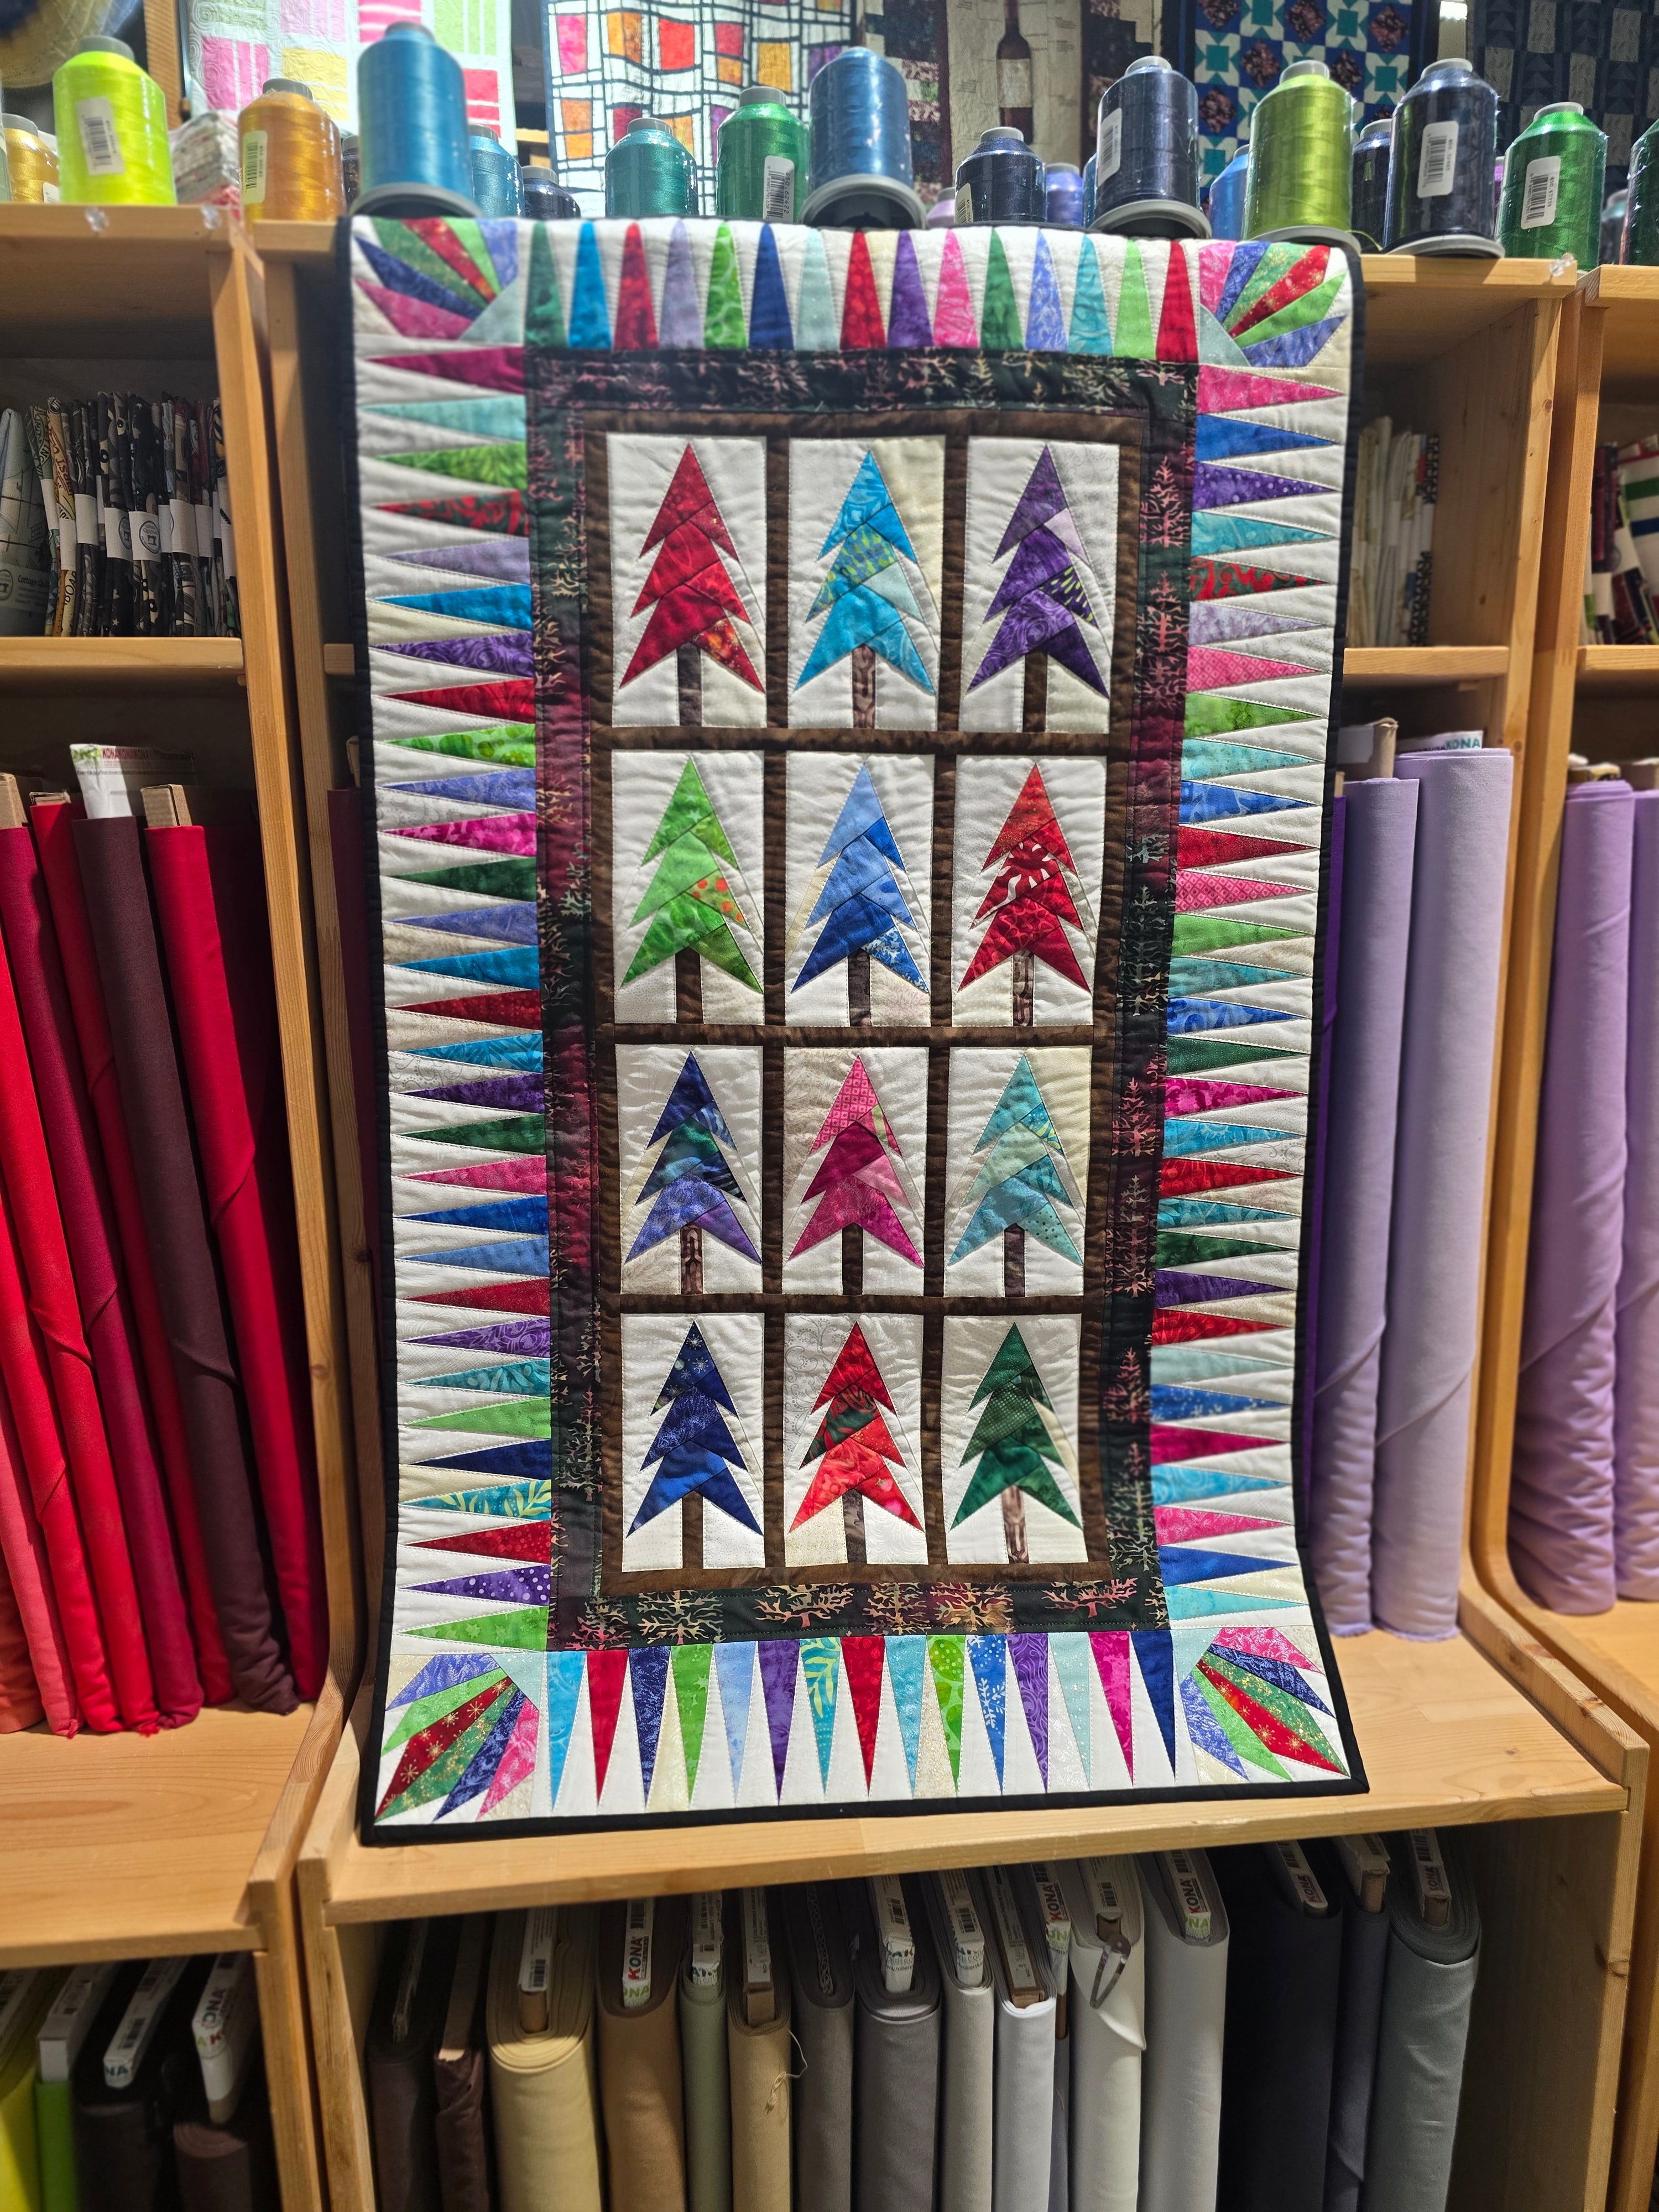
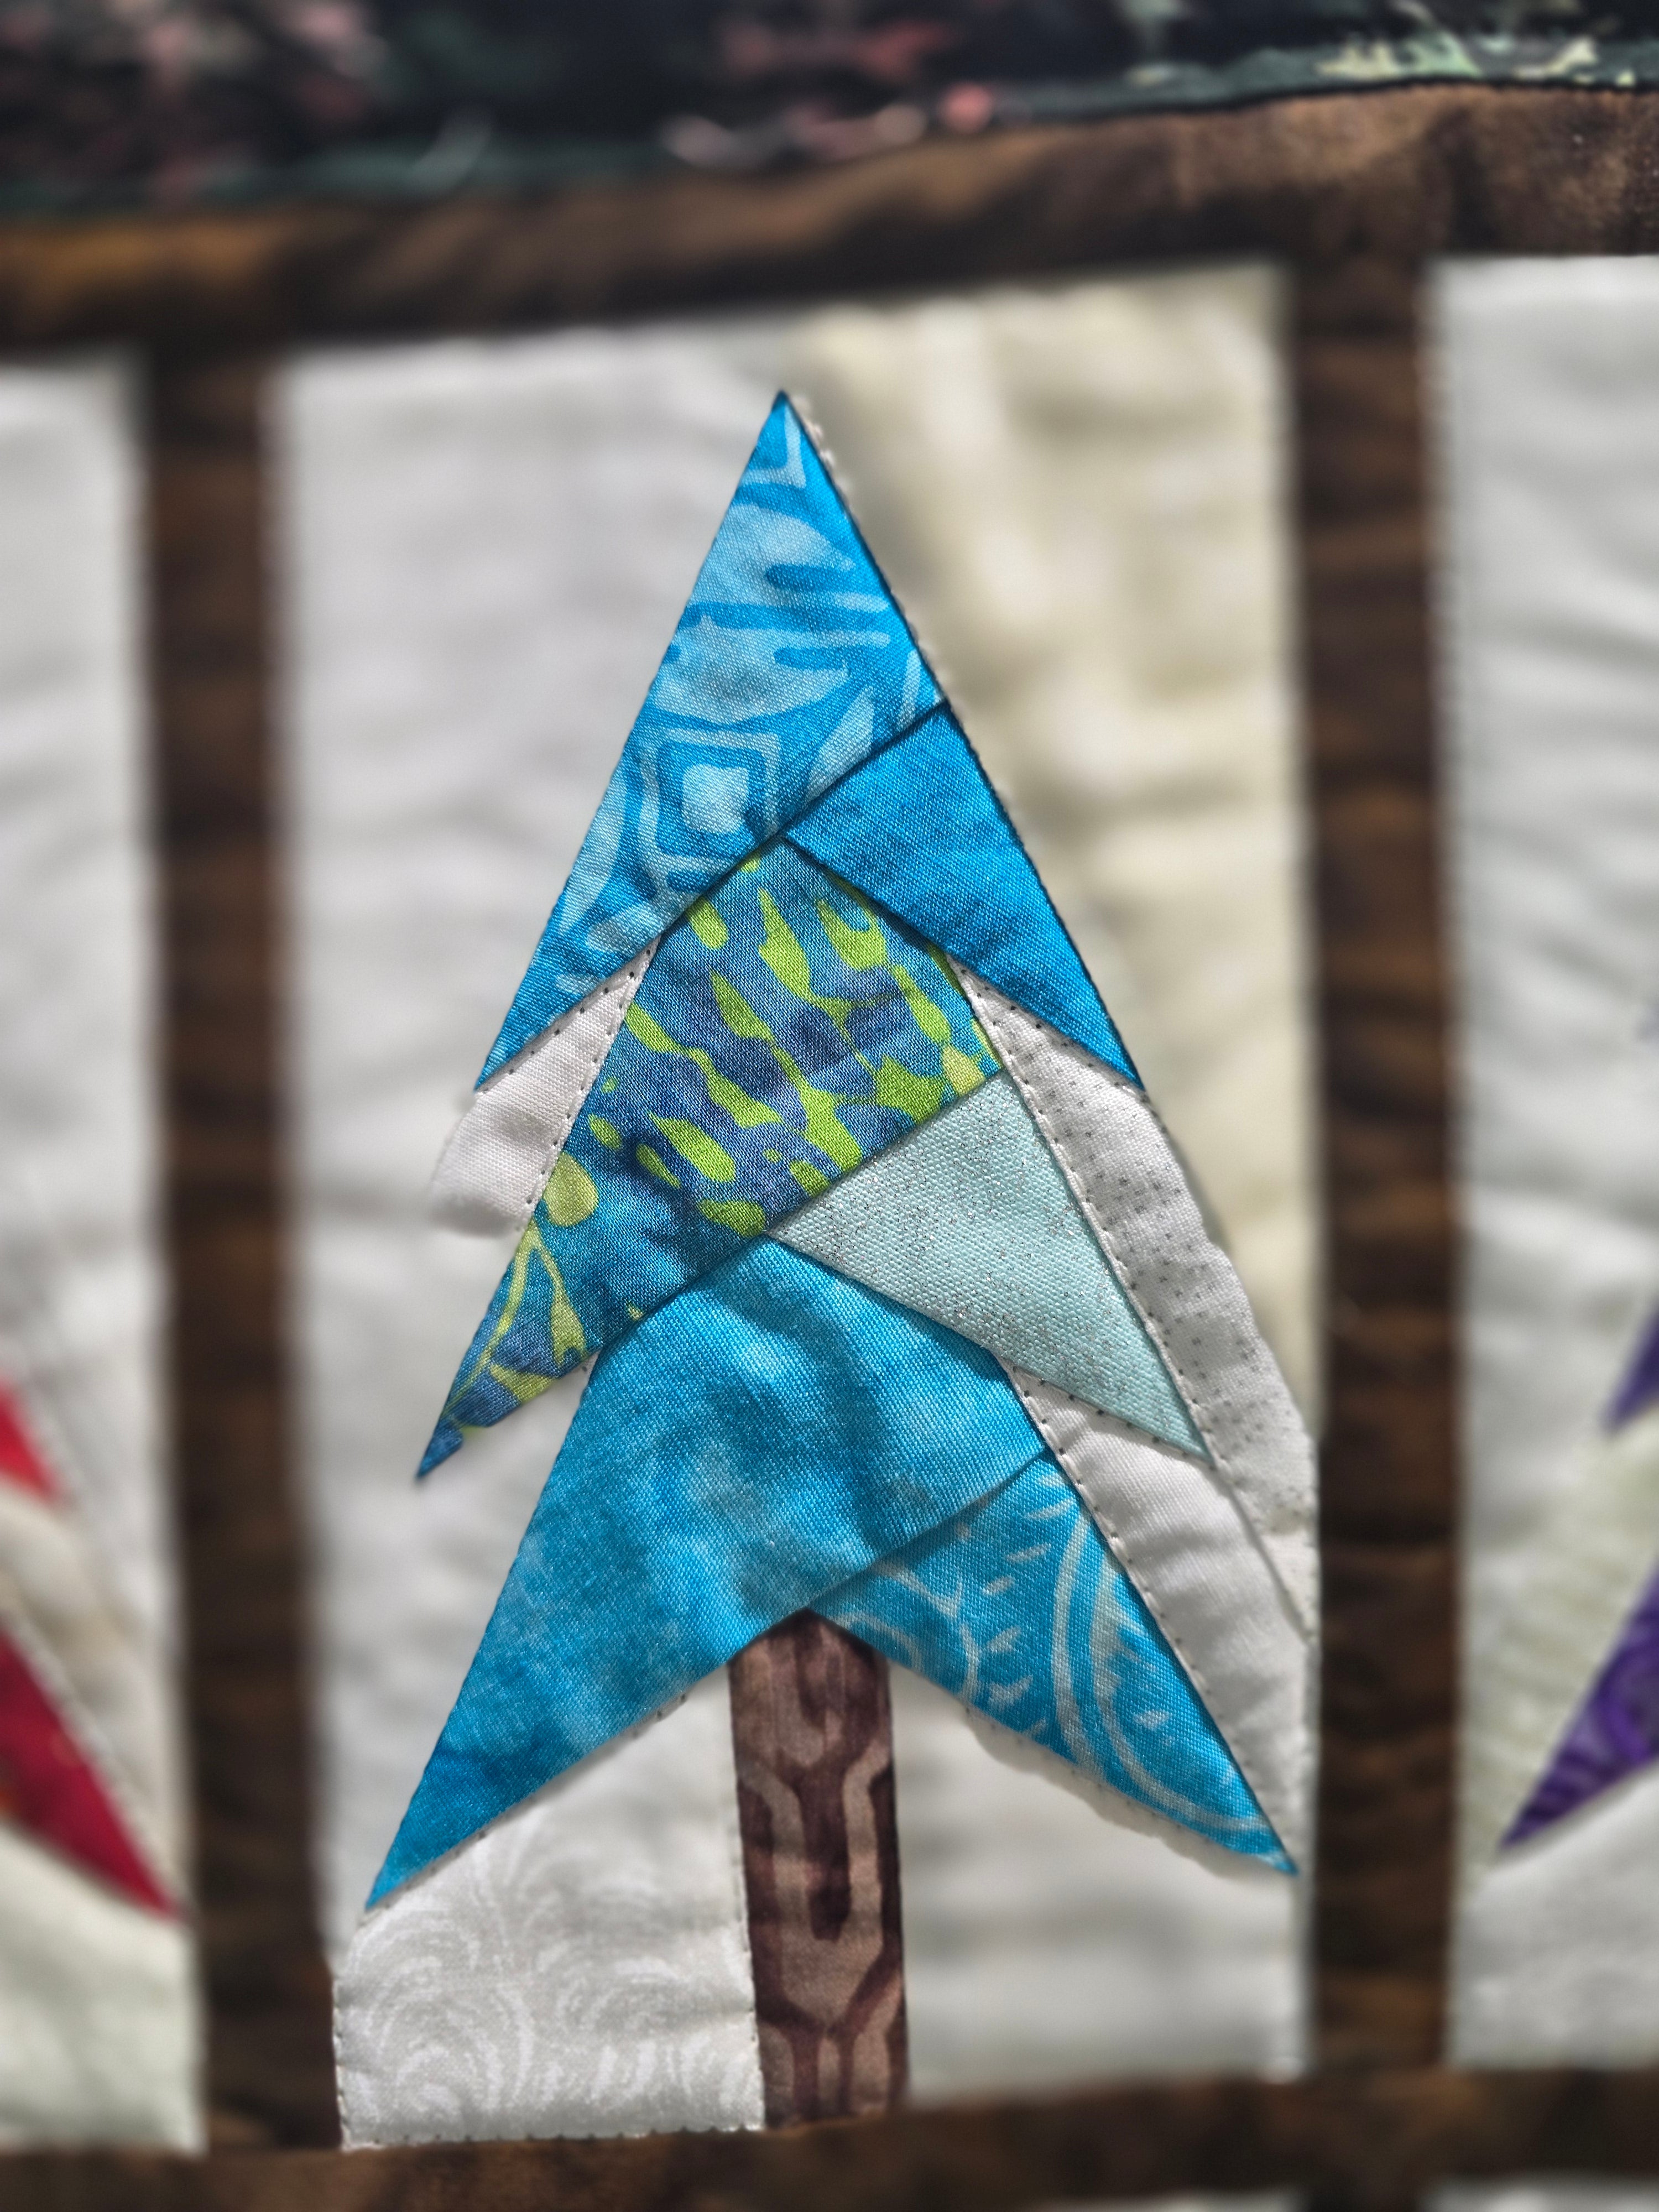
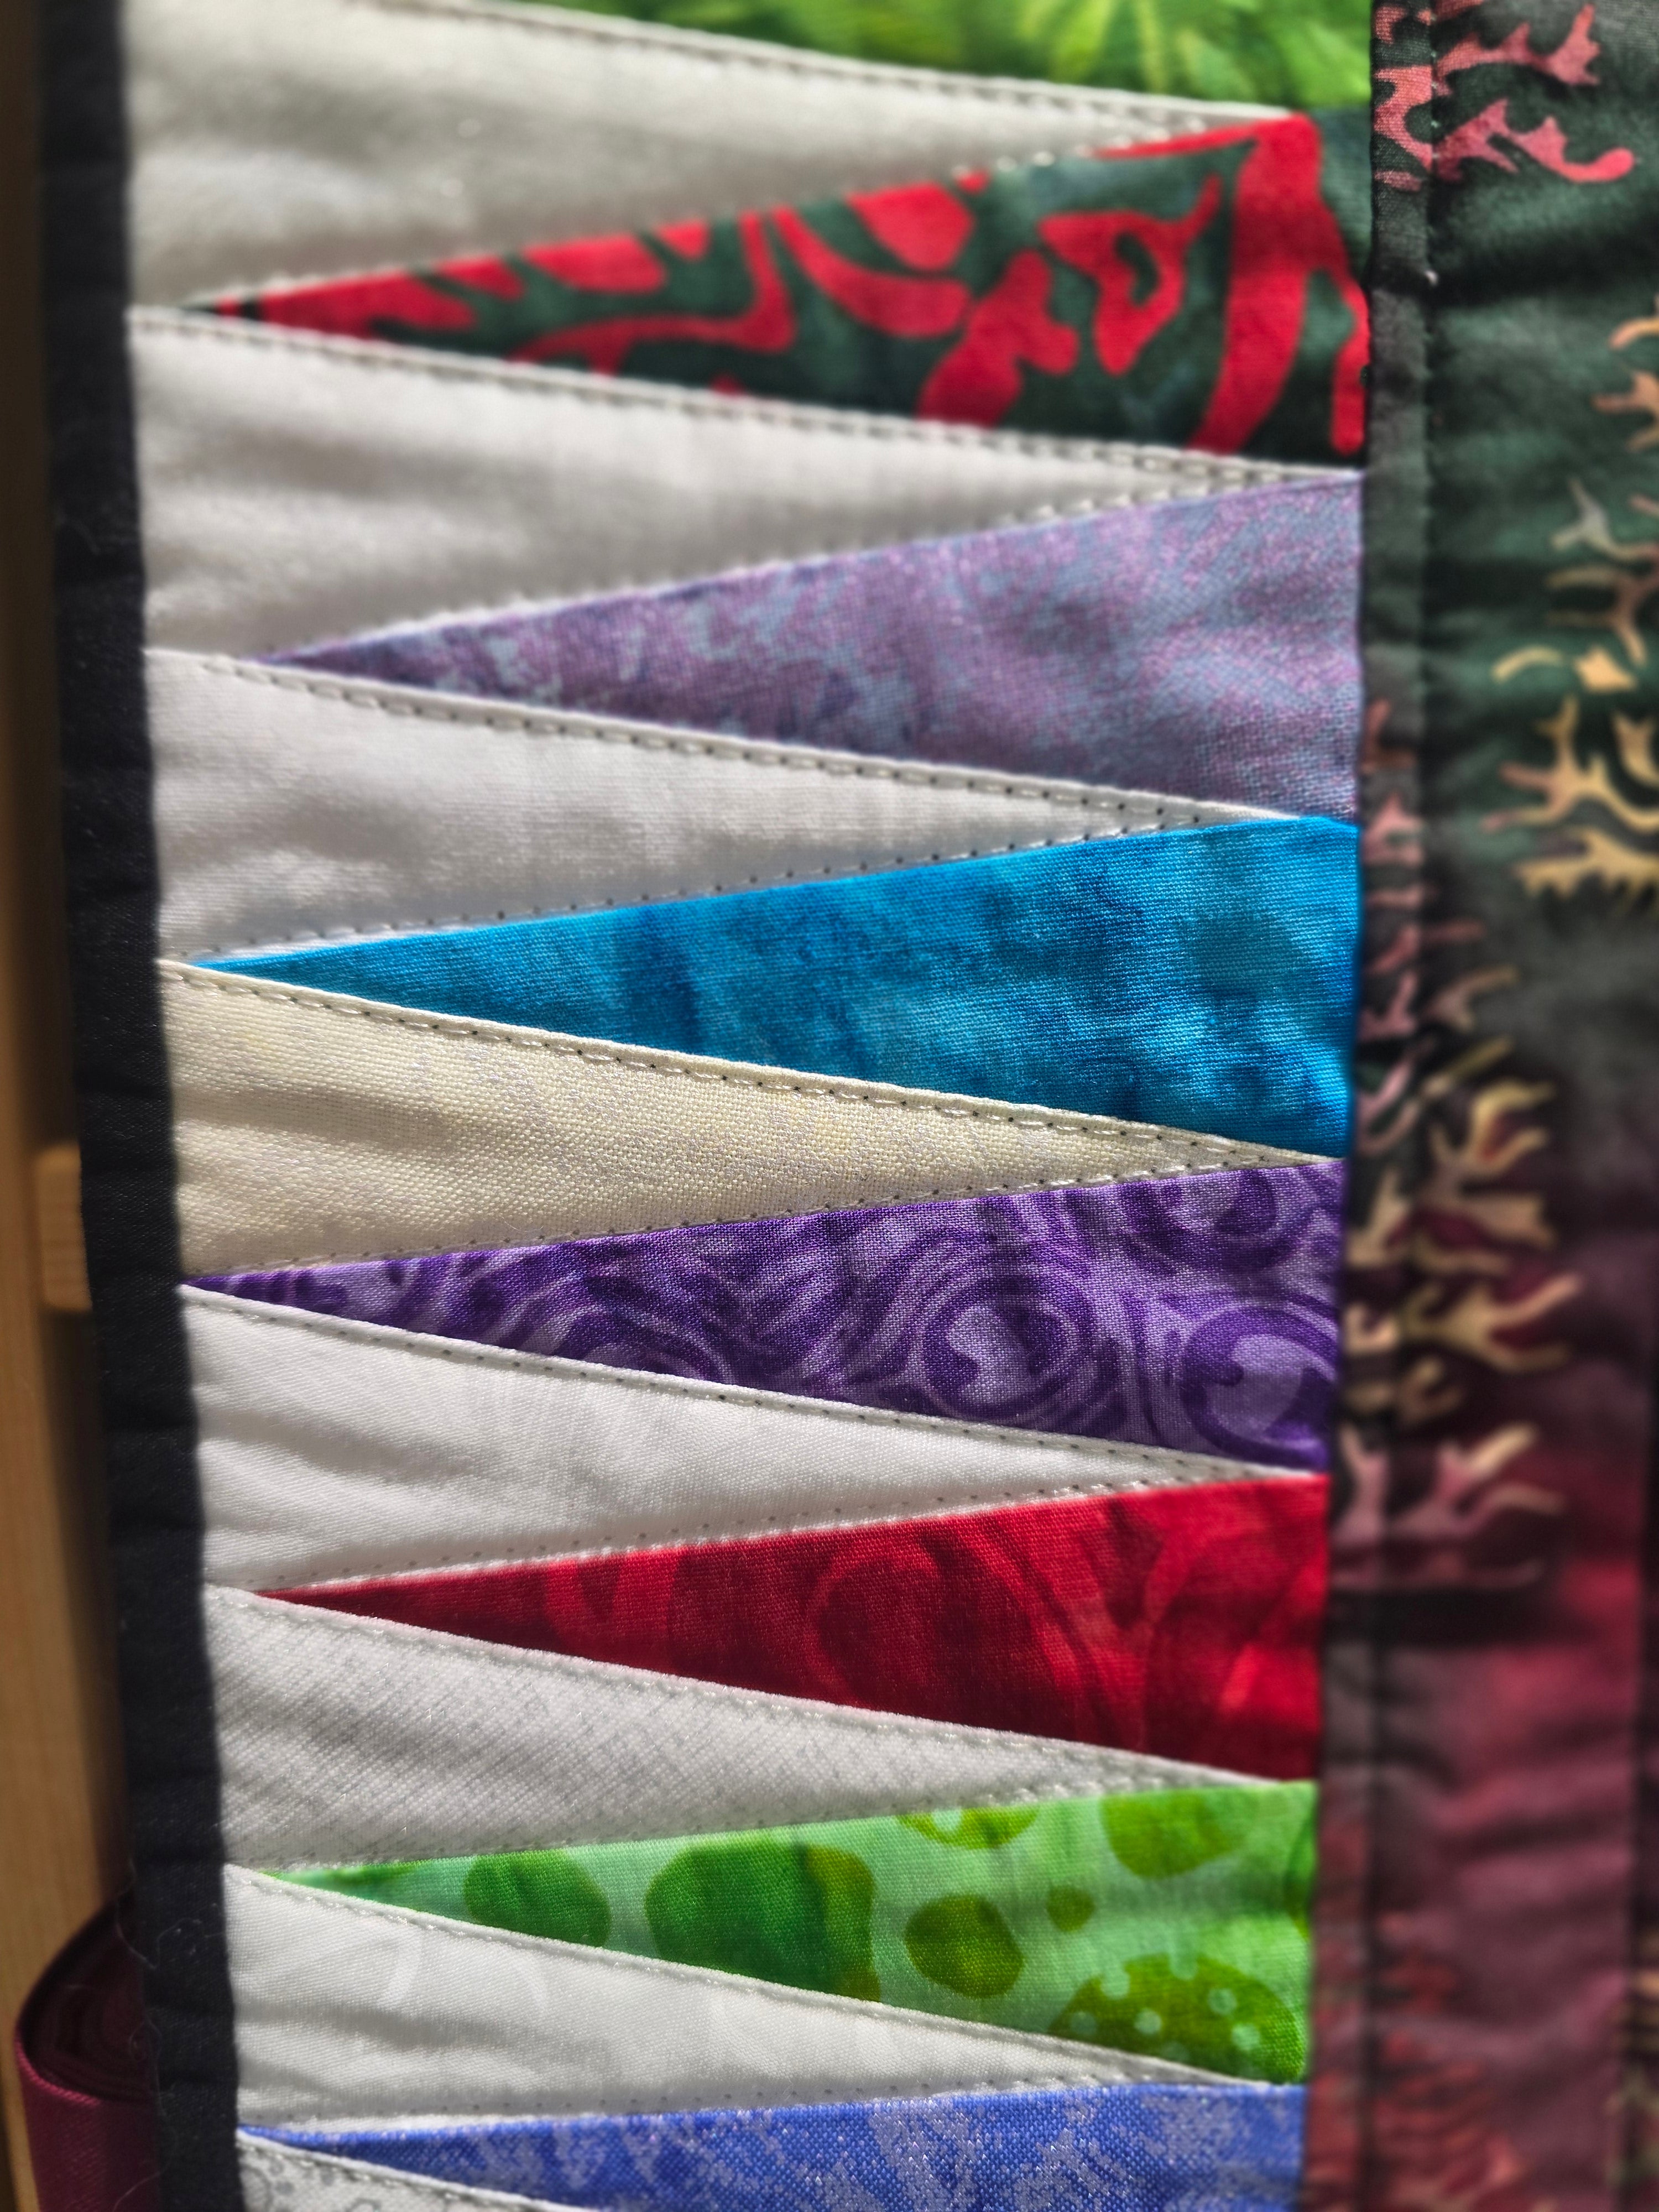
These exquisite little trees sparkle with shades of varying colors. Freezer Paper piecing is the “paperless” paper piecing. No ripping papers off after your block is done! The joy of freezer paper is that it irons on, your fold it out of the way to sew your seams and therefore it easily removes from your block once completed. No messy bits.
If you like paper piecing your sure to enjoy this. If you’ve never done paper piecing before this is a great intro into the paper piecing world.
This is a great scrap buster pattern. You can also use new fabric yardage. Use whatever colors you like. While batiks work wonderfully, regular cottons will also work. Christine added in fairy frost fabric to get some sparkle into hers.
CLASS INFO
Class 1 we will review the pattern, teach how to read, use freezer paper pieces and get started. We will work through a variety of pieces, trees, corners and border. You can then complete the paper piecing in the comfort of your home.
Class 2, we will review and assemble the top.
What you'll learn:
Using Freezer Paper to guide where you will sew
Positioning fabric pieces to the paper, sewing along the folded paper accurately
This class will cover helpful tips and tricks and use of tools
Cost:
$100 for the two days, INCLUDES Pattern
Supplies:
- Pattern, Included
- Fabric
- Tree Trunks
- Tree Background:
- assorted beige, cream, light gold etc. 1.75-2m TOTAL
- Trees/Outer Border:
- assorted bright colors, textures, 1.75-2m TOTAL
- Sashing/Inner Border:
- Middle Border
- Binding
- Backing
- your choice, Finished top size should be 30" x 44" so think 1.25m estimate
- Paper: Freezer Paper 8 ½” x 11” sheets to print your pattern pieces
You will receive your free pattern when registered, but you will notice you need to make multiple copies of trees, corners, borders etc. You will need to purchase pre cut Freezer Paper to run through your printer to make the appropriate copies for the project.
Tools:
- Add a Quarter Ruler and template plastic or Add a Quarter Plus Ruler
- 75/11 Sewing Needles
- Light colored piecing thread
- Foldaway Cutting and Pressing station
- if you do not have this, small mat and ironing station
- Small personal iron
- Rotary Cutter
- Snips
- Paper Scissors
- Fabric Glue
- Marking Tools
- Sewing Machine
- ¼” foot
- or a Non-stick sewing foot will be helpful
---------------------------------------------------------------------------
For those that register, they will need the following information;
Class Preparation
Make a sheet (regular printer paper) with two copies of the same template. Use this photocopy to copy the template pieces onto freezer paper. Refer to the pattern for how many copies of each template you will need. Ensure you copy at 100% to keep the original sizing of the templates.
Refer to your printer on how to place the freezer paper into to the tray. There is a shine side (this will be the sticky side once pressed) and a plain paper side in which the template needs to be printed.
Refer to the pattern and have some fabric pieces precut before class. Organized by color and size per template section